Setting up a crypto wallet is one of the first practical skills U.S. beginners need after learning what digital assets are. A wallet does not store coins the way a physical billfold stores cash. It holds the cryptographic keys that let you receive assets, authorize transfers, and—if you choose self-custody—recover access when a phone or computer is replaced.
This guide walks through a complete beginner checklist for how to set up a crypto wallet: choose a wallet type that matches your goals, download only from official sources, create a new wallet (not a “restore” from someone else’s words), back up the seed phrase offline, lock the device, and understand a small test transfer before you move meaningful amounts. It does not recommend one brand as the only option, promise investment returns, or ask you to type recovery words into websites.
What a crypto wallet actually does
On public blockchains, ownership is proven with private keys. Modern wallets usually show you a recovery phrase (often called a seed phrase or mnemonic) instead of a long string of random characters. That phrase is typically 12 or 24 English words in a fixed order. Anyone who obtains those words can recreate the wallet and move assets. Anyone who loses those words—and has no other backup—may permanently lose access.
Wallets also give you receive addresses (or QR codes) that others can use to send you crypto. Sharing a receive address is normal. Sharing a seed phrase, private key, or “support recovery form” is not.
U.S. investor-education materials from the Securities and Exchange Commission’s Investor.gov emphasize that self-custody means you alone are responsible for keys and recovery phrases, and that loss or theft of those secrets can mean irreversible loss of access. That framing is useful before you click “Create wallet.”
Custodial vs. self-custody (choose on purpose)
Before you install anything, decide who holds the keys.
Custodial wallets / exchange accounts. A company holds assets for you. You log in with a username, password, and usually multi-factor authentication (MFA). Setup feels familiar—similar to online banking—but you depend on that company’s security, policies, and availability. This can be convenient for learning markets and placing trades. It is not the same as holding keys yourself.
Self-custody software wallets. An app or browser extension generates keys on your device. You must protect the seed phrase. You authorize each on-chain send. There is typically no password-reset desk that can restore lost words.
Hardware wallets. A dedicated device keeps private keys offline and asks you to confirm sensitive actions on the device screen. Setup still includes writing down a backup phrase. Hardware options are often chosen when someone plans to hold larger balances for longer periods, but they are not magic: phishing, fake apps, and careless backups still cause losses.
Paper or “air-gapped” approaches. Advanced users sometimes keep keys entirely offline. Beginners usually start with a reputable software or hardware product and strong offline backup habits.
There is no single correct choice for every household. Match the tool to how much responsibility you want, how often you move funds, and how carefully you can store physical backups. Many people use more than one approach over time—for example, a custodial account for small, frequent activity and a self-custody wallet for longer-term holdings.
Beginner checklist: how to set up a crypto wallet
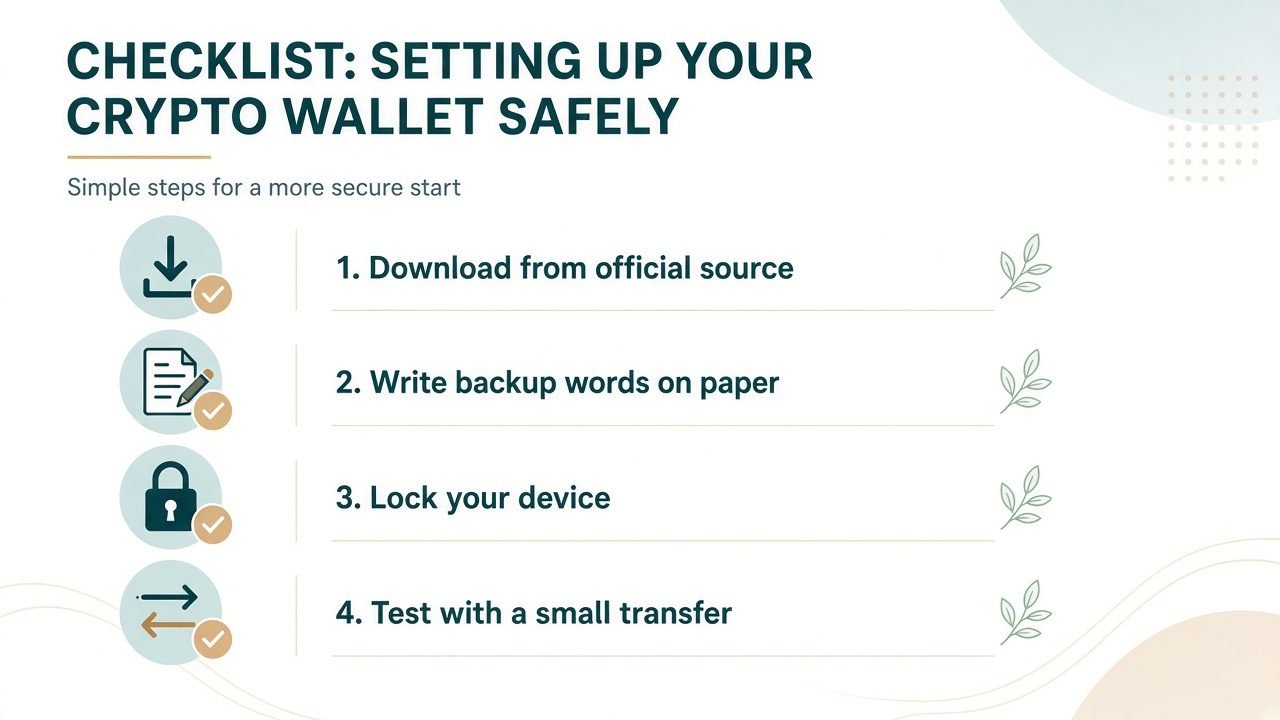
Use this sequence in order. Skipping the backup and device-lock steps is how easy setups turn into permanent lockouts or theft.
- Choose the wallet type (custodial, software self-custody, or hardware) based on control and convenience.
- Download or purchase only from official sources—manufacturer site, verified app-store listing, or vendor you deliberately selected. Avoid ads, DMs, and “helpful” links in search results.
- Create a new wallet on a device you control. Do not import a phrase someone else sent you.
- Write the seed phrase offline in exact order; store it privately; never enter it on a website.
- Lock the device (PIN, passcode, biometrics where appropriate) and enable MFA on any custodial login.
- Learn the receive-address and test-transfer concept with a small amount before moving larger balances.
The sections below expand each step.
Step 1: Choose a wallet type that fits your use case
Ask practical questions, not hype questions:
- Do you want the company to hold keys, or do you want sole control?
- Will you mainly buy and sell, or mainly receive and hold?
- Are you comfortable writing and storing a physical backup for years?
- Is this phone shared with family members?
- Are you setting this up for learning with small amounts, or for a larger transfer later?
If you are not ready for irreversible self-custody mistakes, start with small amounts and strong account security on a regulated platform you researched yourself—while still learning how seed phrases work so you are not surprised later. If you want self-custody from day one, pick a well-documented wallet category (mobile, desktop, or hardware) and follow only that product’s official setup screens.
Avoid treating “most popular” social posts as a buying guide. Popularity attracts fake apps and lookalike domains.
Step 2: Official download only (phishing is the first failure mode)
Fake wallets are built to look legitimate. Attackers buy ads, clone sites, and publish apps with similar names. Your first security control is where you get the software or device.
Practical habits:
- Type the official site address yourself or use a bookmark you created earlier—not a sponsored result you have not verified.
- On mobile, confirm the publisher name in the Apple App Store or Google Play against the project’s official site.
- For hardware devices, buy from the manufacturer or a seller you independently trust; inspect packaging; initialize the device yourself so it generates a new backup phrase on first use.
- Do not install wallet software from email attachments, Discord/Telegram “support” links, or QR codes in random videos.
If anything about a download page asks for your seed phrase “to unlock,” “to sync,” “to claim,” or “to reverse a transaction,” stop. Legitimate setup for a new wallet shows you words to write down; it does not require you to paste words into a browser form from an outside link.
Step 3: Create a new wallet (not a restore from a stranger)
Open the official app or device wizard and choose Create new wallet (wording varies). Set a strong local password, PIN, or biometric unlock as the product allows. That local lock protects casual access to the app; it is not a substitute for the seed phrase backup.
You may be offered optional features such as cloud encrypted backups, account abstraction helpers, or multi-share recovery. Read what each option stores and where. If you do not understand a backup method, stick to the standard offline written phrase until you do.
Never:
- Accept a pre-written seed phrase from a “mentor,” giveaway, or job offer.
- Restore a wallet because a message claims your funds are stuck unless you “validate.”
- Reuse a phrase across unrelated products unless you fully understand the security implications.
Creating new keys means the words appear only on your screen (or device) during setup. Treat that moment as private: no screen sharing, no photos for “later,” no reading the words aloud on a call.
Step 4: Offline seed backup—the non-negotiable step
When the wallet displays your recovery phrase:
- Write the words by hand, in order, on paper or another durable offline medium.
- Double-check spelling against the screen before you leave the setup flow.
- Confirm the phrase inside the official app/device when prompted (this checks your copy; it is not the same as typing words into a random website).
- Store the backup where theft and household accidents are less likely—many people use a locked location at home and consider a second copy in a separate secure place.
- Keep the backup away from cameras, scanners, and cloud note apps.
What not to do:
- Do not screenshot the phrase.
- Do not email it to yourself.
- Do not save it in Google Docs, iCloud Notes, password-manager “secure notes” you have not carefully configured, or chat apps.
- Do not enter the phrase on websites, in customer-support tickets, or in “wallet connect recovery” pages.
- Do not post it for troubleshooting.
U.S. guidance for retail investors is blunt on this point: protect the seed phrase and never share private keys or recovery words. Scammers often impersonate support and ask for the phrase precisely because it grants full control.
If you lose the device but still have an accurate offline backup, you can restore into the official wallet software later. If you lose both the device and the backup, recovery may be impossible. That is the tradeoff of self-custody.
Step 5: Device lock, updates, and basic hygiene
After creation:
- Enable the phone or computer lock screen (PIN/password) and keep OS updates current.
- Prefer a device that is not jailbroken or rooted for day-to-day wallet use.
- Turn on MFA for any custodial exchange or broker login—preferably an authenticator app or hardware security key rather than SMS alone when available.
- Review wallet permissions; be cautious granting clipboard, camera, or accessibility access to unknown apps.
- Separate “browsing and social apps” behavior from “approve transactions” behavior. Approving a malicious signature can drain a self-custody wallet even when the seed phrase never left your house.
For browser extensions, limit the number of sites you connect to, disconnect when finished, and read what a signature request is asking before you approve. “Sign to verify wallet” prompts on unfamiliar sites are a common theft pattern.
Step 6: Receive addresses and the test-transfer concept
Before you move a meaningful balance, practice the mechanics with a small amount you can afford to lose to fees or user error.
Receiving. In your wallet, open Receive, select the correct network/asset if prompted, and copy the address or show the QR code. Send only from a source that supports that same asset on that same network. A Bitcoin address is not an Ethereum address; a token sent on the wrong network can be difficult or impossible to recover.
Test transfer concept. Move a small amount first. Confirm it appears in your wallet explorers or balance screen. Only then increase size. This catches wrong-network mistakes, typo’d addresses (when you did not use paste carefully), and unfamiliar fee settings while the cost of a mistake is still low.
Sending later. When you eventually send out, paste addresses carefully, verify a checksummed address when the wallet shows one, and confirm the network and fee. On hardware wallets, verify the address on the device screen—not only on the computer monitor.
This article does not prescribe dollar amounts or promise that small tests eliminate all risk. It teaches a habit: prove the path works before you trust it with more.
Networks, fees, and labels that confuse beginners
Setup is not finished until you understand a few labels you will see immediately:
- Network / chain. Many assets exist on more than one network. Your wallet must be set to the network the sender is using.
- Gas / network fees. On some chains you need a small balance of the native token to pay for transfers of other tokens.
- Token contracts. Scam tokens can appear in a wallet after dust airdrops. Seeing a balance does not mean you should interact with it.
- WalletConnect and dapp connections. Connecting is not the same as sending, but approvals can authorize future spending. Read prompts.
If a screen is unclear, pause and use official documentation—not a stranger’s remote-control offer.
Optional but useful: recordkeeping for U.S. readers
A wallet setup guide is not tax advice, yet U.S. beginners benefit from a simple habit started on day one: keep your own records of dates, amounts, asset types, transaction IDs, and the platform or wallet involved when you buy, sell, receive, or move crypto. Self-custody makes on-chain history visible on public explorers, but explorers do not automatically label why you moved funds or what you paid in fiat. Export CSV histories from custodial accounts when available, and store notes outside the seed-phrase backup location. Good records reduce stress later; they do not require sharing private keys with anyone.
What “restore” means (so you do not practice it the wrong way)
Restore (or recover) is how you recreate a self-custody wallet from the offline seed phrase after a lost phone, wiped laptop, or replaced hardware device. It is a powerful feature and a common scam pretext.
Safe mental model:
- You open the official app or device and choose restore.
- You enter the words only in that official flow.
- You then verify that expected balances and addresses return.
Unsafe patterns:
- A website asks for the phrase to “start recovery for you.”
- A caller or chat agent offers to “validate” words while you type.
- A search ad leads to a lookalike restore portal.
You do not need to wipe your working wallet today to prove the backup. Many people verify the written words during the wallet’s own confirmation quiz at setup, keep the paper accurate, and only perform a full restore when hardware genuinely changes—or when practicing on a throwaway wallet with negligible value. Never photograph the phrase “just for the restore drill.”
Common setup mistakes (and safer alternatives)
| Mistake | Safer approach |
|---|---|
| Installing from an ad or DM link | Official site or verified store listing only |
| Skipping the written backup | Offline copy before you fund the wallet |
| Photographing the seed phrase | Handwritten or metal offline backup |
| Entering the phrase on a website | Only use official in-app/device restore you started |
| Funding heavily on day one | Small test receive first |
| Shared family phone with no lock | Device lock + separate profiles or separate device |
| Trusting “support” that asks for words | Real support will not need your seed phrase |
Security mindset after the wallet exists
A finished setup is only as strong as the habits that follow. Keep recovery materials offline. Be skeptical of urgency (“funds at risk—verify now”). Bookmark official domains. When you outgrow a phone wallet’s risk profile, evaluate hardware or other custody designs without treating any single brand as mandatory.
Cryptocurrency balances can be volatile. Wallet setup skill protects access and reduces theft risk; it does not create guaranteed profits. If someone sells you a setup method that requires payment in crypto to “activate” a wallet or unlock a bonus, treat it as a scam pattern until proven otherwise through independent channels.
Quick reference: your setup checklist
- [ ] Wallet type chosen (custodial vs. self-custody software vs. hardware)
- [ ] Software or device obtained from an official source
- [ ] New wallet created on a device you control
- [ ] Seed phrase written offline, verified, and stored privately
- [ ] Seed phrase never entered on a website or shared with anyone
- [ ] Device lock enabled; MFA enabled for custodial logins
- [ ] Receive address understood for the correct network
- [ ] Small test transfer concept practiced before larger amounts
- [ ] Official documentation bookmarked for recovery and support
Complete those items and you have done the core work of learning how to set up a crypto wallet the way careful beginners do it: deliberately, offline-backed, and without handing keys to the first polished phishing page that appears in a search ad.
Frequently Asked Questions
How long does it take to set up a crypto wallet?
Most software wallets can be created in under 30 minutes if you include careful seed-phrase backup. Hardware wallets take longer because of shipping, unboxing, firmware checks, and writing the backup. Rushing the backup step to “finish faster” is the most expensive shortcut.
Do I need a crypto wallet to buy cryptocurrency in the United States?
Not always. Many U.S. residents buy through custodial exchange or broker accounts first. A self-custody wallet becomes important when you want to hold keys yourself, use certain on-chain applications, or move assets off a platform. Account availability and rules vary by state and provider; check the platform’s own disclosures.
What is a seed phrase, and why can’t support “just reset it”?
A seed phrase is the human-readable backup of the cryptographic secret that controls a self-custody wallet. Anyone with the words can restore the wallet. Because the design is non-custodial, there is usually no company that can regenerate your phrase if you lose it. That is why offline backup matters before you fund the wallet.
Should I enter my seed phrase on a website to verify my wallet?
No. Do not enter a seed phrase on websites, in pop-up forms, or in chat. The only routine exception is a restore flow you deliberately start inside official wallet software or on a hardware device you control. Pages that demand the phrase to “fix,” “sync,” “claim,” or “stop a hack” are classic theft tactics.
Software wallet or hardware wallet—which should beginners choose?
Choose based on responsibility and balance size, not social-media slogans. Software wallets are accessible for learning with small amounts if official downloads and offline backups are handled carefully. Hardware wallets add an offline confirmation layer that many people prefer as balances grow. Neither replaces good backup hygiene, and no single brand is the only responsible choice.
What should I do after a small test transfer succeeds?
Confirm the asset and network, store your offline backup securely, keep the device updated, and only then decide whether to move larger amounts. Continue treating unexpected airdrops, unsolicited support messages, and signature requests from unknown sites as hostile until verified through official channels.